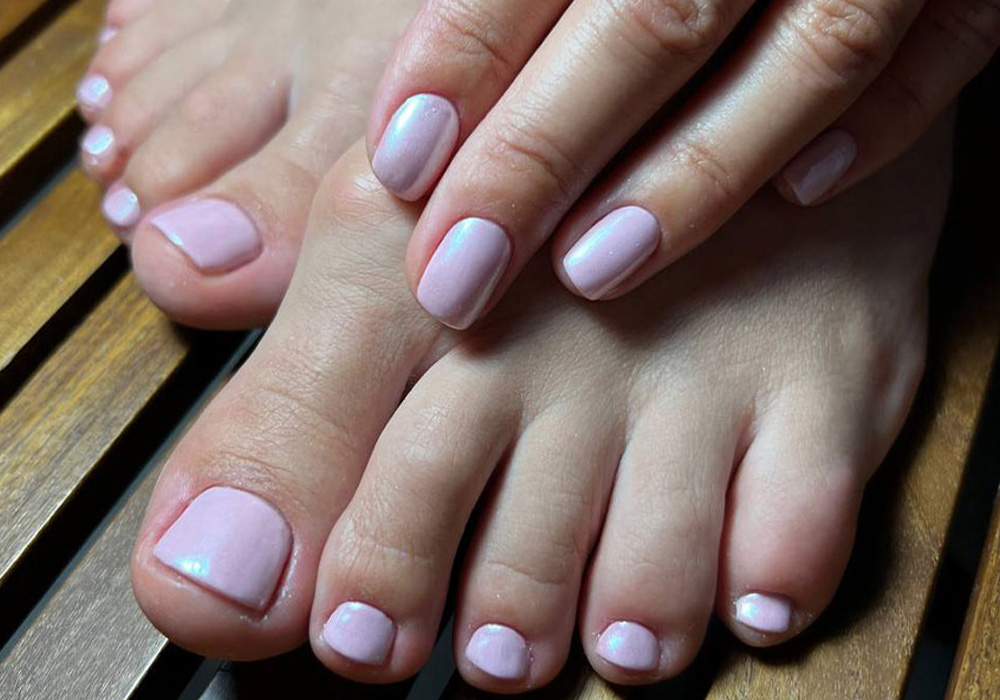
I used to dread pedicures. Not because I didn’t love the result, but because regular nail polish on my toes would chip within days. A week later, my big toes would be bare at the tips, and the rest would look ragged. I’d spend an hour on a home pedicure only to have it ruined by sandals, socks, or just daily life.
Then I discovered gel pedicures—and everything changed.
Gel polish on toes lasts weeks without chipping, stays glossy, and dries instantly under a UV or LED lamp. No more waiting for toes to dry. No more smudging on your sheets. No more mid-week touch-ups.
Here’s everything you need to know about gel pedicures, from what they are to how to do them at home and remove them safely.
What Is a Gel Pedicure?
A gel pedicure uses gel polish instead of regular nail polish on your toenails. Gel polish is a hybrid formula that cures—hardens—under a UV or LED lamp. Unlike regular polish, which dries by evaporation and takes hours to fully set, gel polish is completely dry the moment it comes out of the lamp.
The result is a glossy, durable finish that lasts 2-4 weeks on toes without chipping, fading, or peeling.
Gel pedicures can be done at a salon or at home with the right supplies. The process is very similar to a gel manicure, but toenails require a few extra considerations (thicker nails, more moisture exposure, and the challenge of reaching your own feet).
Benefits of a Gel Pedicure
Why switch from regular polish to gel for your toes?
Long-lasting wear. Regular toenail polish often chips within a week, especially on big toes. Gel lasts 2-4 weeks, often until you’re ready to remove it.
Instant drying. No more sitting with your toes spread apart, afraid to move. Gel cures in 30-60 seconds under an LED lamp. You can put on socks and shoes immediately.
High-gloss shine. Gel maintains its mirror-like finish for the entire wear. No dulling or fading.
Protection for natural nails. Gel acts as a shield, preventing your toenails from staining and reducing breakage.

Perfect for sandal season. When your toes are on display, you want them to look perfect. Gel ensures they stay that way through beach trips, pool days, and long walks.
How to Do a Gel Pedicure at Home: Step by Step
Doing your own gel pedicure requires a bit of flexibility (or a helper), but it’s absolutely possible. Here’s how.
What You’ll Need
- UV or LED lamp (large enough for toes or a portable lamp you can position)
- Gel base coat
- Gel color polish (your choice)
- Gel top coat
- Nail dehydrator or rubbing alcohol
- Lint-free wipes
- Cuticle pusher and nippers
- Nail file and buffer
- Toe separators (very helpful)
- Cotton balls and acetone (for removal later)
Step 1: Prep Your Toenails
Start with clean, dry feet. Remove any old polish. Trim toenails straight across (never curve corners—this prevents ingrown nails). File edges smooth. Gently push back cuticles. Lightly buff the nail surface to remove shine.
Wipe each toenail with dehydrator or alcohol on a lint-free wipe. This removes oils that prevent gel from sticking. Do not touch nails after this step.
Step 2: Apply Base Coat
Apply a thin layer of gel base coat to all toenails. Be careful not to get it on skin or cuticles. Cap the free edge (run the brush along the nail tip). Cure under the lamp for the recommended time (usually 30-60 seconds for LED, 2 minutes for UV).
Step 3: Apply Color
Apply a thin layer of gel color. Cure. Repeat for a second thin layer. Two thin coats are better than one thick coat—thick gel peels and cures unevenly.
Pro tip: Use toe separators to keep toes apart and prevent accidental smudging.
Step 4: Apply Top Coat
Apply a thin layer of gel top coat. Cap the free edge again. Cure fully.
Step 5: Wipe and Hydrate
After curing, wipe each nail with alcohol on a lint-free wipe to remove the sticky inhibition layer. Apply cuticle oil to each toe and massage in.
That’s it. Your gel pedicure is complete and completely dry.
How Long Does a Gel Pedicure Last?
A properly applied gel pedicure typically lasts 2 to 4 weeks on toenails. Toenails grow slower than fingernails, so you won’t see visible regrowth as quickly.

Factors that affect longevity:
- Proper prep. If nails aren’t dehydrated and buffed, gel will lift.
- Capping the free edge. Sealing the tip prevents water from getting underneath.
- Thin layers. Thick gel peels.
- Your activity level. Runners or hikers may experience more wear.
- Shoe fit. Tight shoes pressing on toes can cause lifting.
Most people find that gel pedicures last until they’re ready for a new color—often 3-4 weeks. Unlike fingernails, toenails don’t get as much handwashing or chemical exposure, so they hold up beautifully.
How to Remove Gel Pedicure Safely
Removing gel from toes is similar to fingers, but patience is extra important because toenails are thicker and more prone to damage from scraping.
What You’ll Need
- Pure acetone
- Cotton balls or pads
- Aluminum foil (cut into squares)
- Cuticle pusher (wooden is gentler)
- Nail buffer
- Cuticle oil
Step-by-Step Removal
Step 1: File the top layer. Gently buff the shiny top coat off each toenail. This allows acetone to penetrate.
Step 2: Soak cotton in acetone. Saturate cotton balls with pure acetone. Place one on each toenail.
Step 3: Wrap with foil. Wrap a foil square around each toe, holding the cotton in place. Make it snug but not tight.
Step 4: Wait. Set a timer for 10-15 minutes. Use this time to relax.
Step 5: Check and push. Unwrap one toe. The gel should slide off easily with a wooden stick. If it resists, rewrap and wait 5 more minutes.
Step 6: Never scrape. If gel isn’t coming off, you didn’t wait long enough. Forcing it damages the natural nail.
Step 7: Buff and hydrate. After all gel is removed, lightly buff any residue. Wash feet, apply cuticle oil generously, and follow with foot cream.
Common Mistakes to Avoid
Skipping prep. Dehydrating and buffing are essential. Oily nails reject gel.
Using regular top coat. You need a gel top coat that cures under the lamp.
Applying thick layers. Thick gel peels, bubbles, and cures unevenly.
Getting gel on skin. Cured gel on skin lifts at the edges and can cause allergic reactions over time. Clean up before curing.
Peeling off gel. Never. Peeling rips layers of your natural nail. Always soak off properly.
Forgetting to cap the free edge. Unsealed tips let water in, causing lifting.

Frequently Asked Questions
Can I use the same lamp for toes as fingers?
Yes, as long as your lamp is large enough to fit your toes comfortably. Some people prefer a smaller, portable lamp they can position.
Is gel pedicure safe for toenails?
Yes, when applied and removed correctly. Never peel, and always keep gel off skin.
How often should I take a break from gel toes?
Every few months, give your toenails a week or two of bare, oiled recovery. This lets you check for any damage or discoloration.
Can I wear socks over a gel pedicure?
Absolutely. Once cured, gel is completely dry. You can put on socks and shoes immediately.
The Bottom Line
Gel pedicures are a game-changer for anyone tired of chipped toenail polish. With instant drying, weeks of glossy wear, and the ability to do them at home, they’re perfect for sandal season, vacations, or just treating your feet to something special.
The process takes a little practice—bending over your own toes with gel brushes isn’t always graceful—but the results are worth it. Your feet will look polished and put-together for weeks, with zero maintenance in between.
Read also: The Complete Guide to Pedicure Spa: Relaxation and Care for Your Feet
